
Want crisp, high quality photos in your Instagram Reels but everything keeps coming out blurry when you post? Oh yeah, I totally understand the feeling. This blog post is going to take you through my steps on how to get high resolution and clear photos on your Instagram Reels. I hope this helps along your journey. Let’s get started.

1. EXPORT YOUR PHOTOS IN LIGHTROOM AT THEIR HIGHEST QUALITY
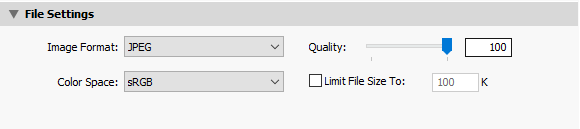
Save your high quality images to a folder on your desktop named “Reels” or something that will help you remember! This will save you from the hassle of trying to search from them later. To transfer the photos to your mobile device for the next step, here’s what to do:
- For Mac/Apple users, Airdrop the photos to your mobile device. This is going to give you the best quality when transferring. *airdrop is available for Apple products
- For PC users, upload the photos to a gallery host like Pic-Time and download them in high resolution to your mobile device.
2. DOWNLOAD THE SPLICE APP
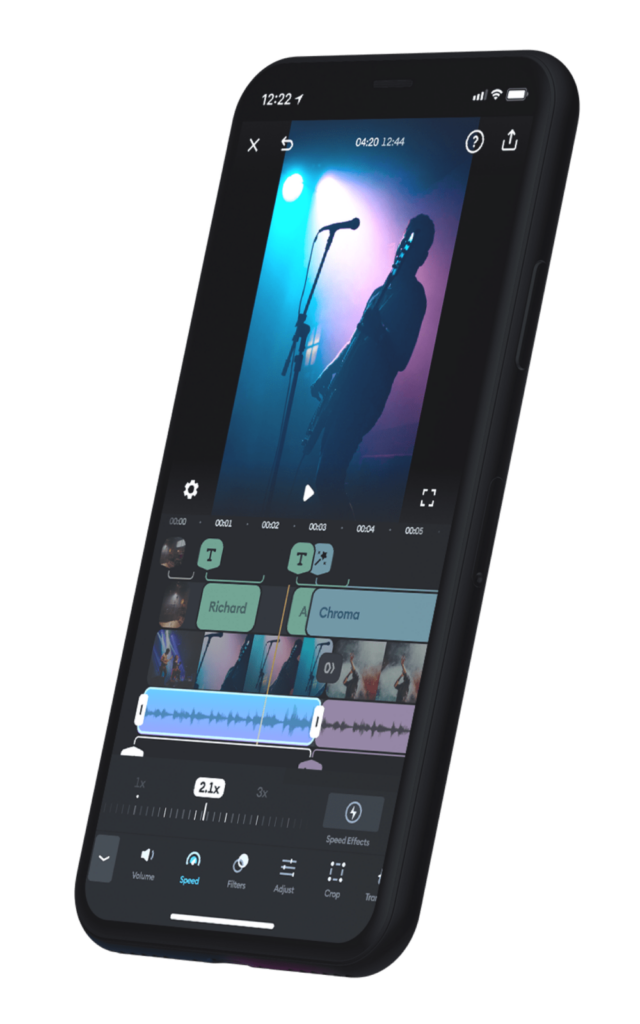
I swear by this app. This has changed my Reels game, for sure. Splice is a video editing app that will make your Instagram life much easier. It’s an affordable app with weekly, monthly and yearly subscriptions. The app has everything from audio extracting (which is great for taking Audio off of TikTok that you love), video reversal, music, filters, transitions, text over video and so much more. Here are the top reasons why I love using Splice for creating my Instagram Reels:
- Splice is a drag and drop kind of app. Instead of having to delete multiple clips just to get back to one like on Instagram, Splice makes it easy to move around any of your media. This helps when creating slideshows of images or multiple video clips.
- You can create a Reel that is already the right dimensions/size for Instagram’s standards. When I create Reels using Splice, I use the orientation “Portrait – 9:16″.”
- Splice won’t mess up the quality when you export it to your phone. This is one of the only apps I’ve used that doesn’t eff up the resolution on any of my photos of videos. It gives you the option to download your video in high quality or lower, depending on your preference.
3. EXPORT YOUR VIDEO AND ENJOY!

Easy peasy lemon squeezy. You are now ready to put your Reel on Instagram for everyone to see.
*a little trick: if you’re worried about the quality of your reel and want to see it beforehand, make a “mystery account” which is actually just a private account. You can view the Reel there before posting on your business page and see if you need to make any adjustments.


 2")


Greetings! Very helpful advice within this article!
It is the little changes which will make the most important changes.
Many thanks for sharing!
“Wow, I absolutely loved reading this article on how to have high-resolution photos for Instagram Reels! It provided such clear and practical tips to enhance the visual quality of my content. The step-by-step guide was incredibly helpful, and the explanations were concise yet comprehensive. Now, thanks to this article, my Instagram Reels look incredibly professional and polished. Thank you so much for sharing such valuable insights, Savannah! Keep up the amazing work! Best regards, Nicholas Jensen.”
Good blog post. I certainly appreciate this website. Continue the good work!
Pretty! This has been an extremely wonderful post. Thank you for providing this info.
Very good article. I am experiencing many of these issues as well..
I’m blown away by the quality of this content! The author has obviously put a great amount of effort into investigating and arranging the information. It’s inspiring to come across an article that not only provides useful information but also keeps the readers captivated from start to finish. Hats off to her for producing such a brilliant work!
A powerful share, I simply given this onto a colleague who was doing a bit of analysis on this. And he in actual fact purchased me breakfast as a result of I found it for him.. smile. So let me reword that: Thnx for the treat! However yeah Thnkx for spending the time to discuss this, I really feel strongly about it and love reading extra on this topic. If doable, as you turn into experience, would you mind updating your weblog with extra particulars? It is extremely useful for me. Huge thumb up for this weblog submit!
Hi! This is my first visit to your blog! We are a group of volunteers and starting a new project in a community in the same niche. Your blog provided us beneficial information to work on. You have done a extraordinary job!
This is the perfect website for everyone who hopes to find out about this topic. You know so much its almost hard to argue with you (not that I actually would want to…HaHa). You definitely put a new spin on a subject which has been discussed for years. Wonderful stuff, just great.
Excellent web site you have here.. It’s difficult to find excellent writing like yours nowadays. I truly appreciate people like you! Take care!!
Woah! I’m really digging the template/theme of this blog. It’s simple, yet effective. A lot of times it’s hard to get that “perfect balance” between usability and visual appeal. I must say you’ve done a fantastic job with this. Additionally, the blog loads very quick for me on Chrome. Superb Blog!
Way cool! Some extremely valid points! I appreciate you writing this write-up and also the rest of the site is also very good.
There’s certainly a great deal to find out about this issue. I love all of the points you’ve made.
Normally I don’t learn article on blogs, however I would like to say that this write-up very compelled me to take a look at and do it! Your writing style has been amazed me. Thanks, quite great article.
Everything is very open with a clear clarification of the issues. It was really informative. Your site is very helpful. Thanks for sharing!
I need to to thank you for this excellent read!! I definitely loved every bit of it. I have got you saved as a favorite to look at new things you post…
Pretty! This has been an incredibly wonderful article. Many thanks for supplying this info.
Hey very cool blog!! Man .. Beautiful .. Amazing .. I will bookmark your site and take the feeds also?I’m happy to find a lot of useful info here in the post, we need work out more techniques in this regard, thanks for sharing. . . . . .
Howdy! This blog post could not be written any better! Going through this post reminds me of my previous roommate! He constantly kept preaching about this. I am going to forward this article to him. Fairly certain he will have a great read. Thanks for sharing!
Spot on with this write-up, I honestly believe that this site needs a lot more attention. I’ll probably be returning to read more, thanks for the information.
It’s hard to come by experienced people on this topic, however, you seem like you know what you’re talking about! Thanks
This blog was… how do I say it? Relevant!! Finally I have found something which helped me. Thanks!
This really answered my drawback, thank you!
It’s difficult to find knowledgeable people about this subject, but you seem like you know what you’re talking about! Thanks
whoah this blog is wonderful i love reading your articles. Keep up the good work! You know, many people are looking around for this information, you can help them greatly.
This is a very good tip particularly to those new to the blogosphere. Short but very precise information… Thanks for sharing this one. A must read article!
Wonderful items from you, man. I have take into accout your stuff prior to and you’re just too fantastic. I really like what you’ve obtained right here, certainly like what you are saying and the way in which wherein you assert it. You make it enjoyable and you continue to take care of to stay it wise. I can’t wait to read much more from you. This is really a great site.
A fascinating discussion is definitely worth comment. I believe that you ought to publish more about this subject matter, it may not be a taboo subject but typically people don’t discuss these topics. To the next! Many thanks.
Pretty! This was an incredibly wonderful article. Many thanks for supplying this info.
I am so happy to read this. This is the kind of manual that needs to be given and not the accidental misinformation that’s at the other blogs. Appreciate your sharing this greatest doc.
I really like it when individuals get together and share views. Great website, keep it up!